Just 3 rules
90% OF SURVIVALThe rest comes on its own. This must not fail.
Quieter = alive longer
The whole map hears you sprint. Walk. Listen. The map talks to you.
Bring cheap
You will die. A lot. Bring what does not hurt to lose — until you learn the maps.
Leave on time
"One more building" = dead with a full backpack. A living backpack > a full grave.
Raid = 4 moves
THE WHOLE GAME IN ONE ROWLoot is yours only once you extract. Before that — you are just carrying it.
Prep
Cheap loadout + safe pocket ALWAYS full
Take
Quietly. By priority. No greed.
Profit
Sell the surplus, KEEP materials
Do / don't
NO PHILOSOPHYTape it to your monitor.
Do
- ✓Quests in order fastest XP + they teach you the map — all 137 by trader →
- ✓Safe pocket always full key / quest item / most valuable small loot
- ✓Craft ammo who crafts — shoots
- ✓Learn 2+ extracts plan B before you need it — interactive Dam map →
- ✓Stop and listen 10 seconds of silence = free radar
Don't
- ✕Don't sprint everywhere the whole map hears you
- ✕Don't bring your best gear fear is cured by cheap runs
- ✕Don't shoot on sight half the lobby does not want a fight — use that
- ✕No "one more building" greed = #1 cause of death
- ✕Don't sell materials you will need them for the base and quests
Who you stomp, who you run from
MACHINES TOPSIDEOne look — one decision. The images are real, from the game.
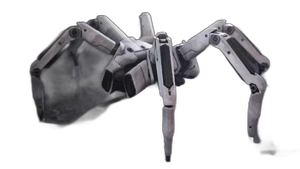
Tick
take it down and move on
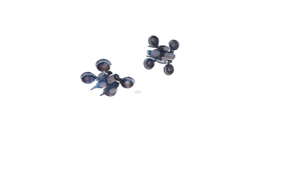
Wasp
target practice
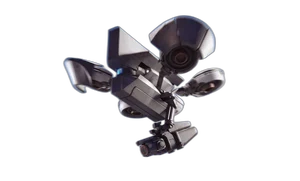
Hornet
shock slows you — keep distance

Surveyor
calls attention — quietly or not at all
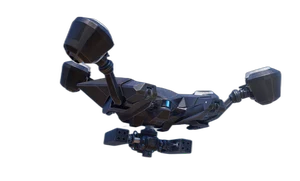
Rocketeer
strafe sideways, keep cover
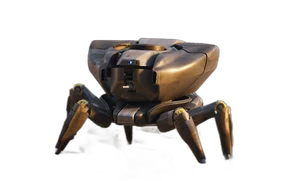
Bastion
*doable in a team — never solo
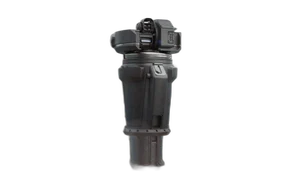
Shredder
light ammo = NOTHING
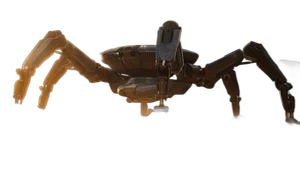
Queen
watch from afar and learn
Small things that save you
ONLY THE GOLDTen things veterans do automatically. Learn them today.
Kill the flashlight at night
A flashlight in the dark = a glowing target on you. Endure the dark instead.
Go high
Machines track poorly upward. Roofs and upper floors buy you time and cover.
Smoke BEFORE extracting
Throw smoke/flash before calling the beacon — hide your position while you extract.
Take out scouts first
ARC patrols in groups. The scout marks you and calls the rest — him first.
After a kill — move
ARC sends reinforcements to the gunfire fast. Do not stay where you shot.
Shield > HP
Shields recharge and forgive mistakes. Worth more than raw HP.
Suppressors pay off
Every shot calls both machines and players. A quiet shot = a longer life.
Drop a decoy
Drop cheap loot to fool a pursuer — then vanish in another direction.
Let others fight it out
Do not chase the first fight. The third party arrives to a done deal — be the third party.
Hit the weak spot
Armored machines have a "core" — aim for it, do not empty mags into armor.
Pick your class
AUGMENT = YOUR CLASSOne per run. Your augment also decides which shield you carry.
Combat
Looting
Tactical
No squad? On Discord a raid crew comes together in five minutes — just hop in and say hi.
Road to endgame
MAP ORDERDo not skip steps — every map is a school for the next one.
Dam Battlegrounds
you learn EVERYTHING here — stay until you chain extractions · open the interactive map →
Buried City
tight corridors — a school of sound
Blue Gate
keys start to matter
The Spaceport
events = big fights
Riven Tides
zone with flying ARC
Stella Montis
the richest loot, the deadliest lobbies
Pendola Pass
the newest map, lots of vertical terrain
Your grind plan
CHECK AS YOU PLAY17 tasks. All checked = you are surface-ready. Progress is saved in your browser. Stuck on a step? Nobody here makes a fuss about beginner questions — ask on Discord, someone has surely died in the same spot already.
Progress
0/0 RECRUITHour 0–1
Runs 1–5 · Dam
Hour 3–6
Hour 6–10
Next level
PLAN BEFORE YOU SPENDYou don't have to go alone
THE CREW ALREADY EXISTSFirst topside runs are easier with someone who already died in the same spots. No pressure, no sign-up rituals — hop in, ask, we play together.
Discord community →
experienced raiders, quick answers and a crew for a shared raid — beginner questions welcome
Luxxx Maximus live →
watch raids live, ask in chat whatever bugs you — we often play together with viewers
More guides →
luxxxmaximus.com — guides and tools for the games we play, all in one place